
Notifications
Functionality
The product ensures timely notification of employees and enhances the organization's efficiency.
Product functional properties:
- Manual notification sending.
- Viewing the notification log and delivery status for each sending channel.
- Interactive receipt of notifications directly in the user interface.
- Access control division for notification setup and sending.
- Automatically sending notifications to users through various channels.
- Setup of recipient groups.
- Configuration of notification types based on their business purpose.
- Adjust the sound signal.
- Adding files to the notification.
- Setting up notification sending.
- Setting up notification storage in the database.
Supported dispatch channels:
- Email;
- Telegram;
- Organization structure distribution, employee list;
- SMS;
- Push-notifications.
Architecture
Notification Types
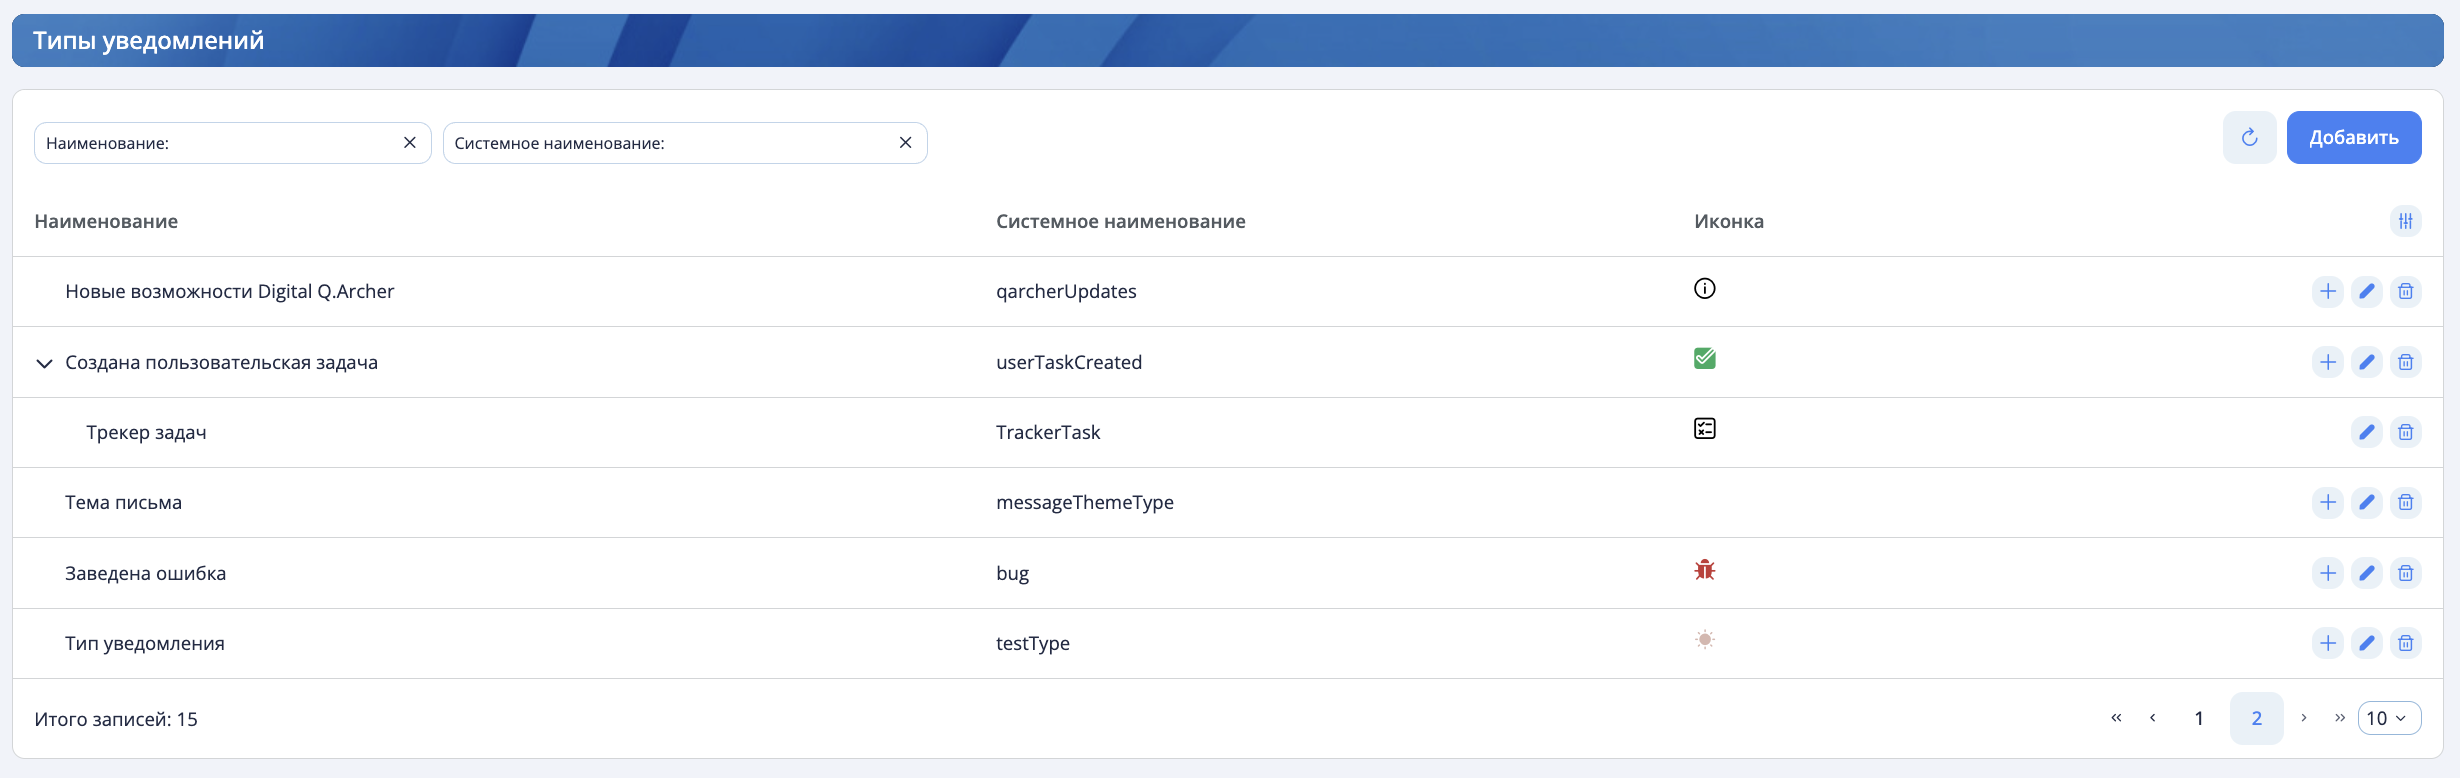
The notification interface provides a section called "Notification Types." Notification types have a maximum nesting level of 2. Notification types are intended for grouping notifications into different types/categories. Available actions for types:
- Add a parent type;
- Add a child type;
- Edit;
- Delete.
A notification type has attributes: name, system name, and an icon - for visual distinction among other types.
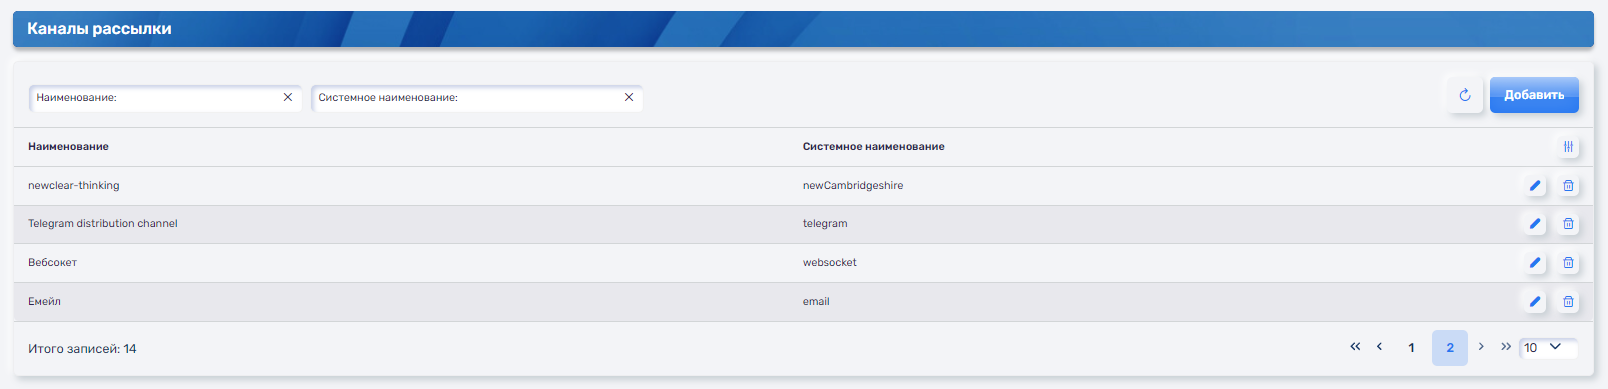
Dispatch Channels
This section describes the channels through which notifications are sent. The product has distribution channels:
- Telegram
- Websocket / Employee's Workspace
- SMS
- Push-notifications
It is possible to add new channels if necessary. When adding, specify the name and system name of the new channel. When sending a notification to a new channel, a message will be generated in the Kafka message broker, where the topic name will have a suffix - the system name of the new channel. To ensure successful notification delivery to a non-distribution channel, it is necessary to create a service adapter that implements the logic for sending to that channel.
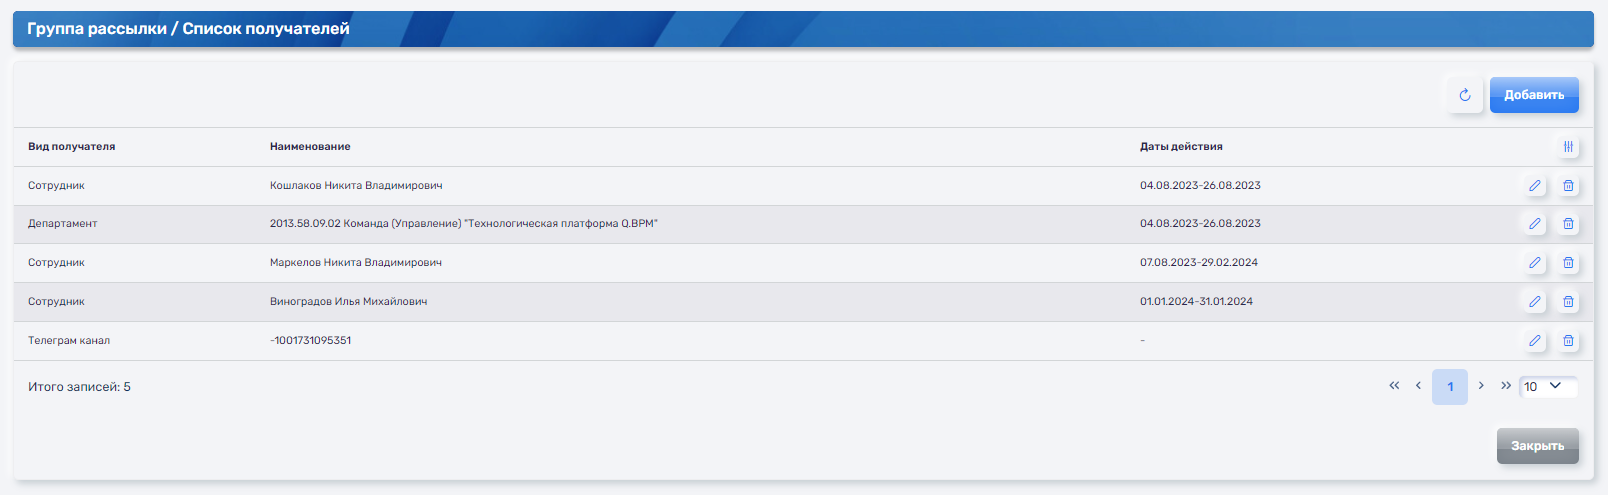
Recipient Groups
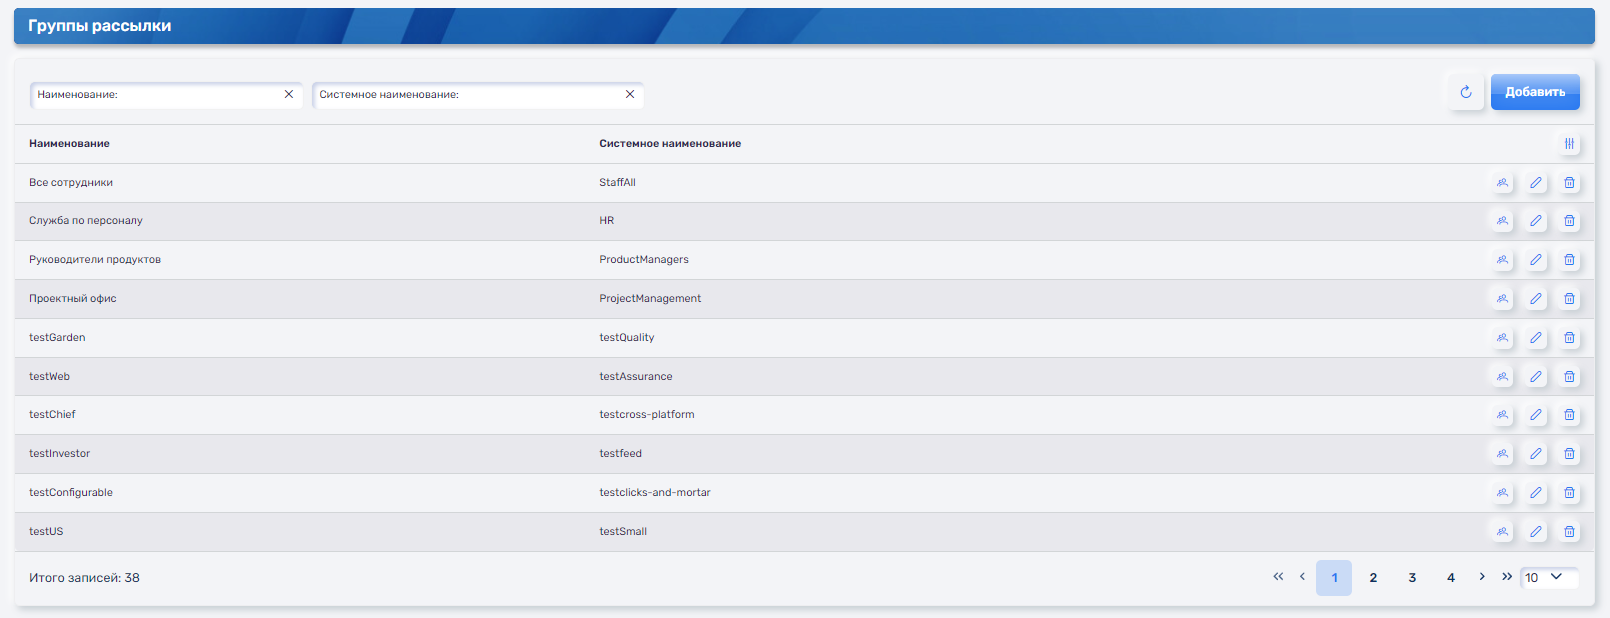
In the notification interface, there is a section called "Recipient groups". The object describes the list of recipients to whom the notification should be delivered. The recipient can be:
- Employee;
- Department;
- Role;
- Telegram channel;
- Email.
In the case of department and role recipients, employees who are part of the specified organizational structure are determined.
Notification Template
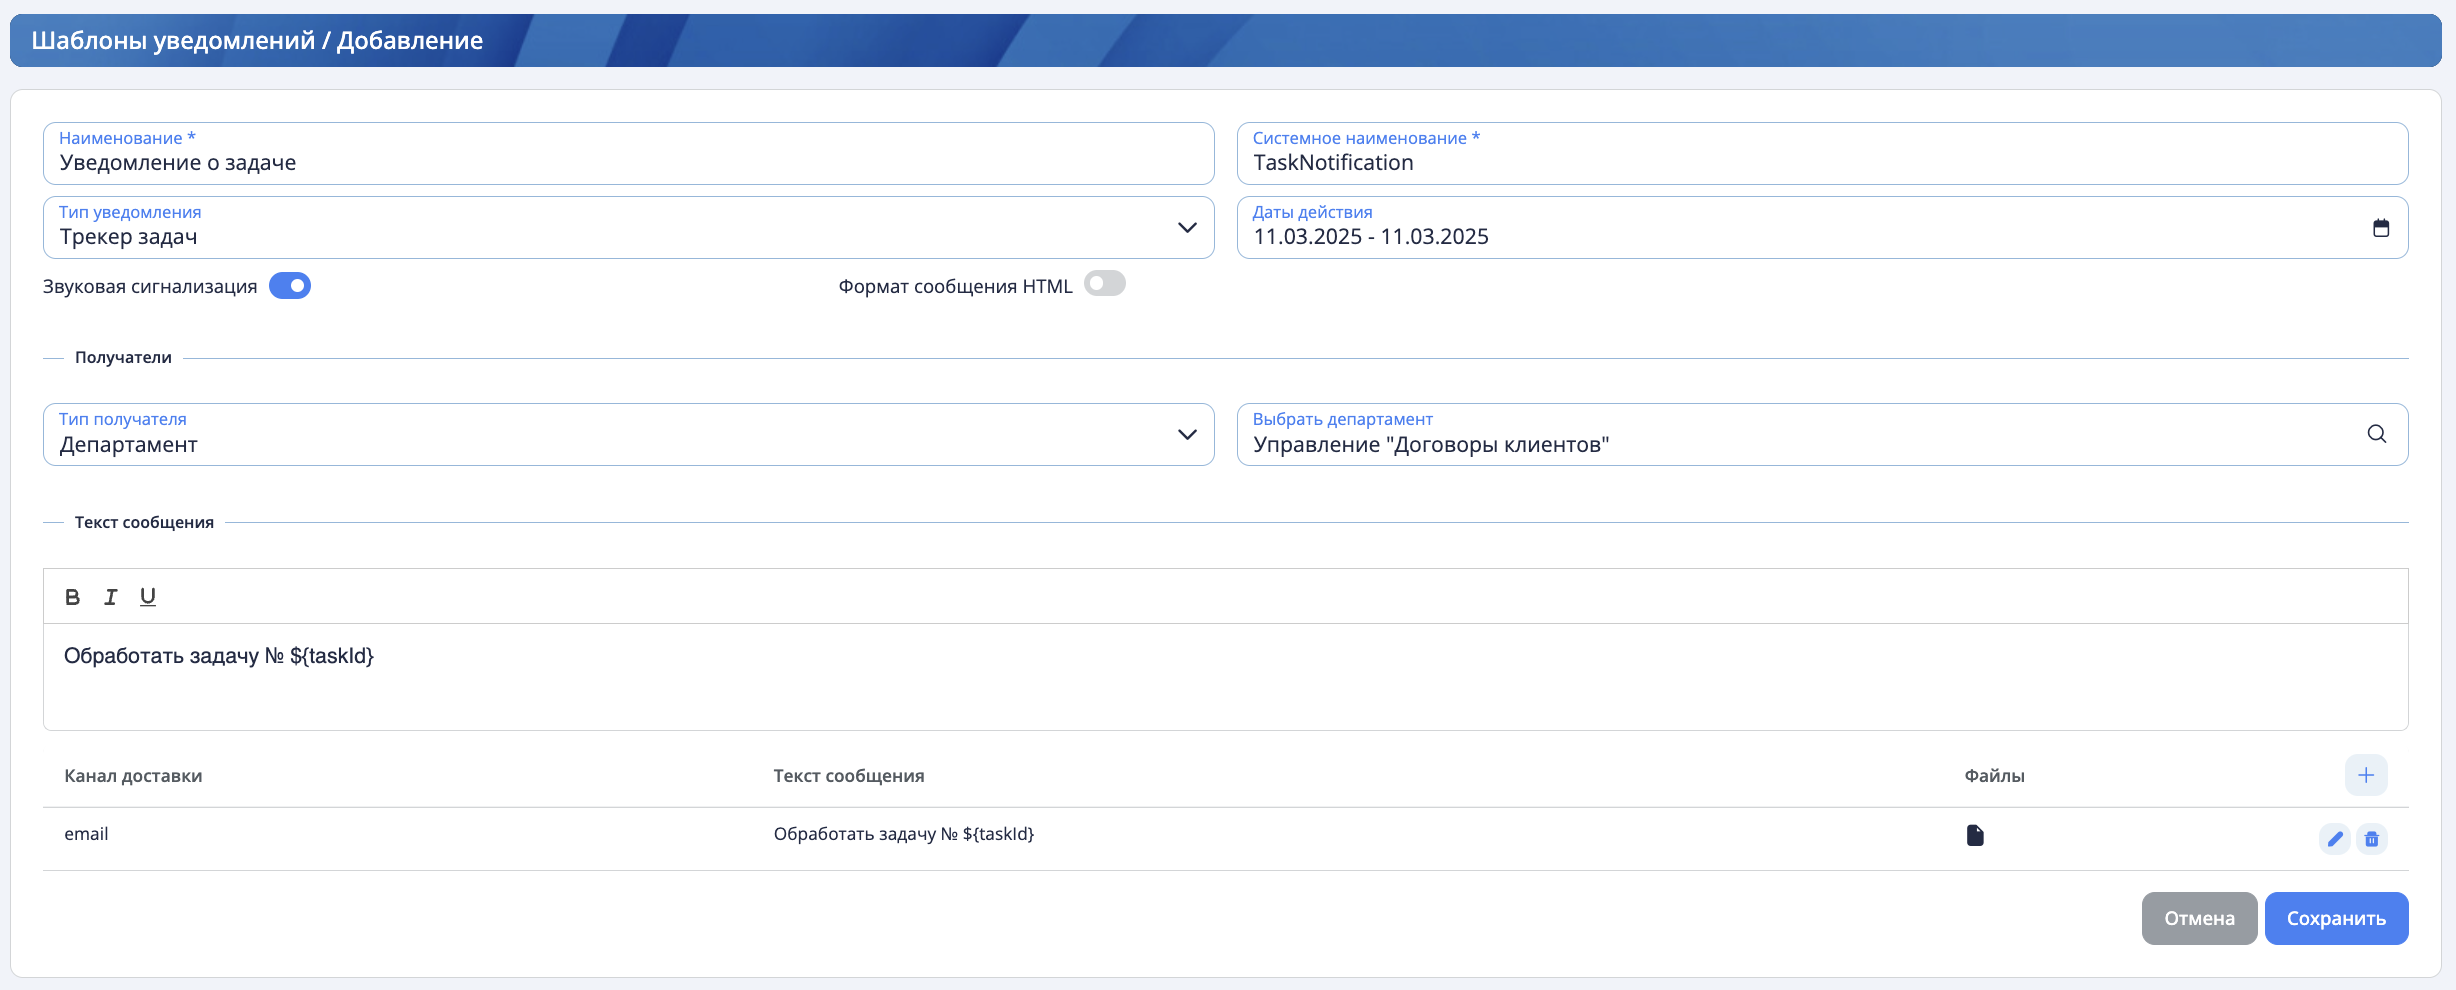
In the notification interface, there is a section called "Notification Templates." The template is used for repeatedly sending a notification with pre-configured parameters. In the template, fill in the following information:
- Template name;
- Template system name;
- Notification type;
- Template validity period;
- Enabling notification sound;
- Message template text - this can be static text or text with parameters. It can be specified in plain or HTML format;
- Choose a recipient: it can be a specific object (employee, role, department, Telegram channel, email) or a group of recipients;
- Add the channels through which the notification will be sent. For each channel, you can specify a separate message text. If the text is not specified, the template message text is used by default.
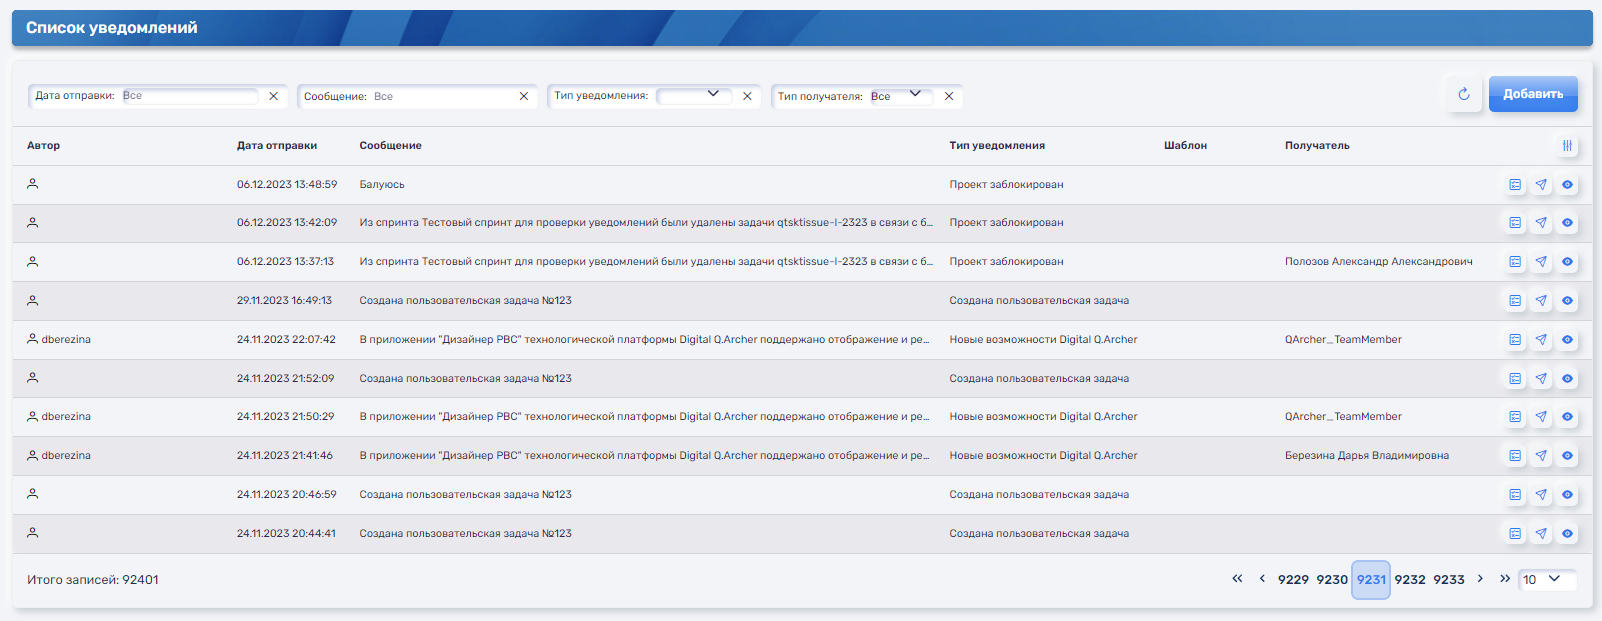
Notification List
The notification list interface contains information about all sent instances of notifications:
- Channels to which the notification was sent;
- Sending date;
- Notification recipients;
- Final text appearance;
- Notification type;
- Notification template.
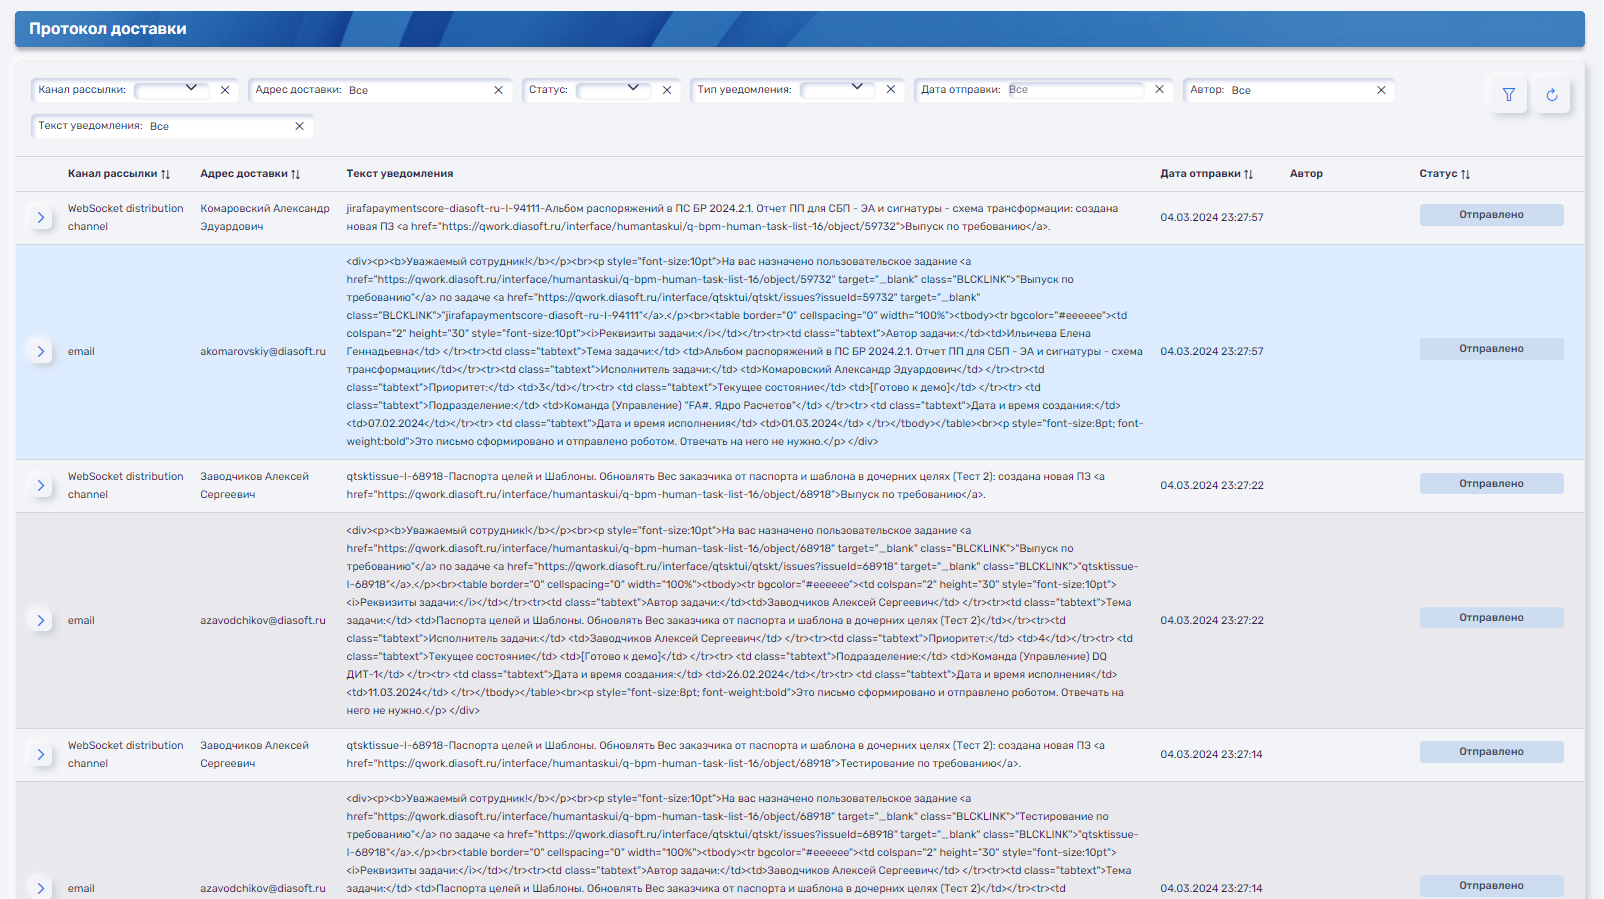
Delivery Protocol
The delivery protocol interface displays detailed information and status on sent notifications for each employee recipient.
Notification sending
Notification sending is a set of service notifications sent using templates from processes. For convenience, mailing lists are defined by groups. By default, all notifications that are sent using a template and do not relate to any of the configured notification sendings are sent as part of a system-wide mailing list.
If the template is not included in any notification sendings, then it is included in the default notification sending - "System-wide newsletter". Users will not be able to configure receiving notifications from this template separately and will be able to disable receiving notifications from the template by disabling the system-wide mailing list entirely.
After creating a notification sending and including notification templates in it, you can manage notifications sent using this template: configure delivery channels, enable or disable notifications throughout the notification sendings.
Notifications sent without a template are not regulated by mailings and cannot be disabled.
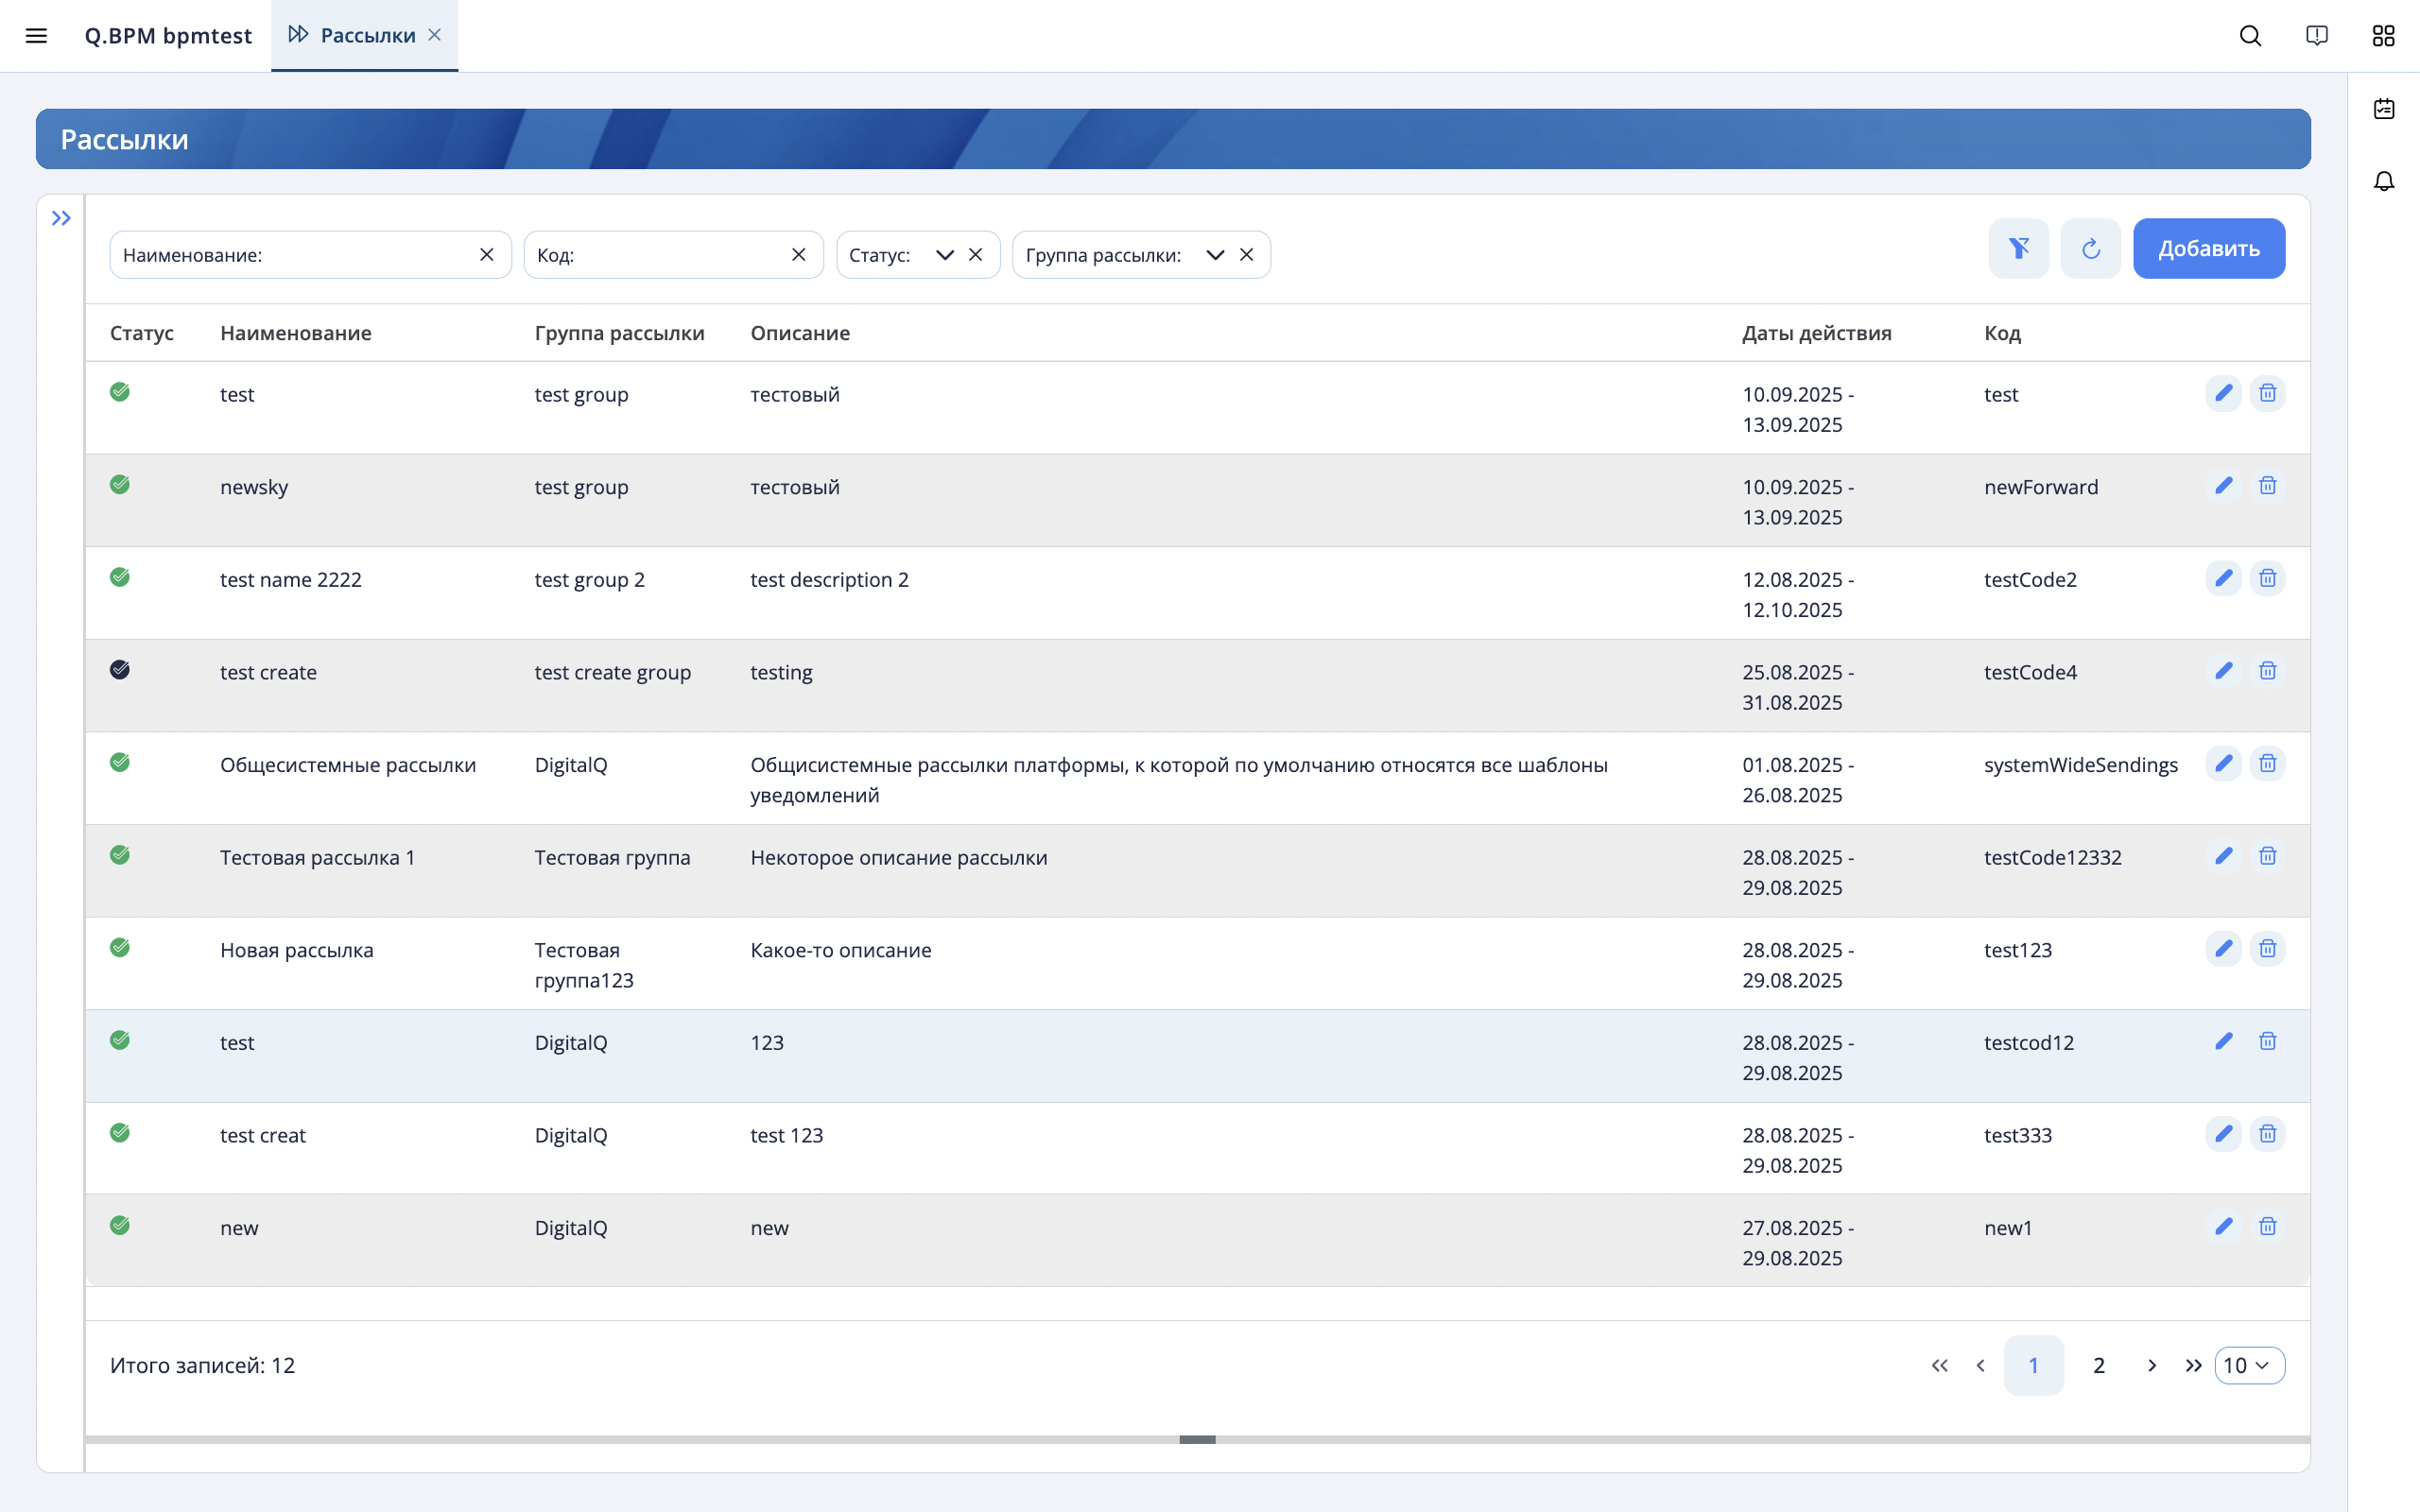
Setting up mailing lists
In order to create a notification sending for the service, you need to:
- Go to the "Notification sendings" section. This section is only available to users who have administrator rights for the notification service.
- Add a mailing group by clicking the "+" button in the "Sending Groups" sidebar on the right.
- In the sidebar that opens, specify the group data and click the "Save" button.
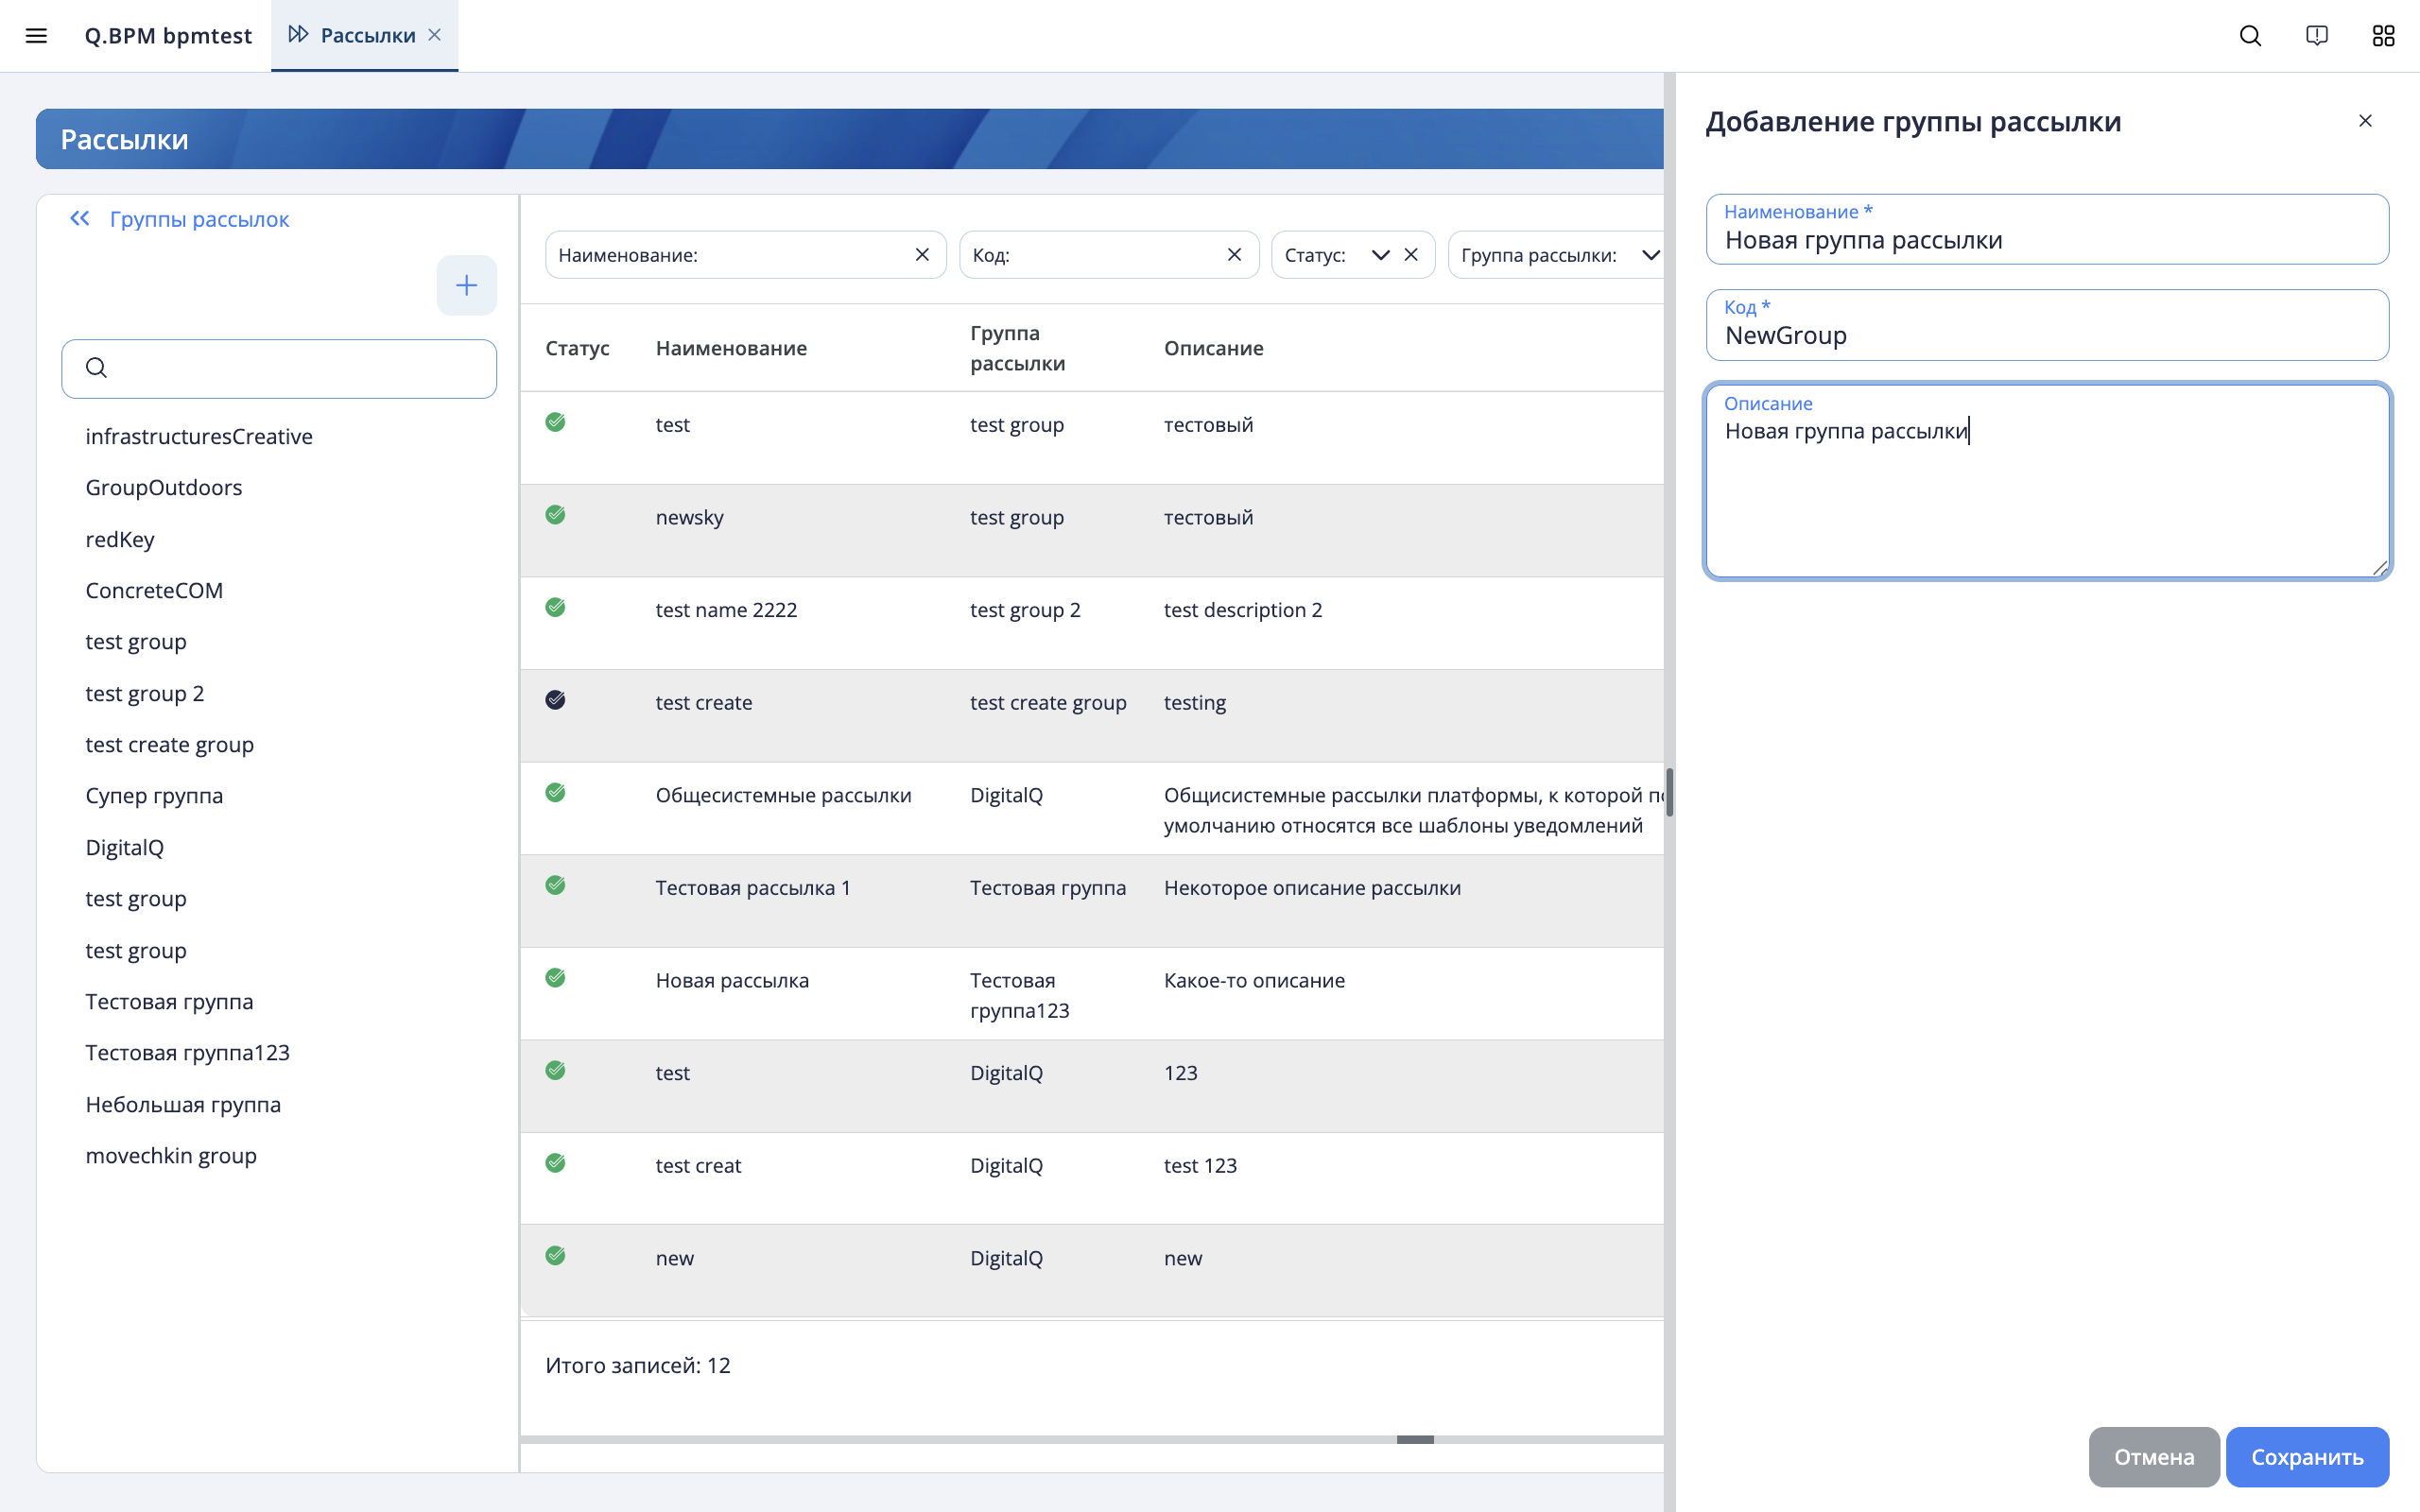
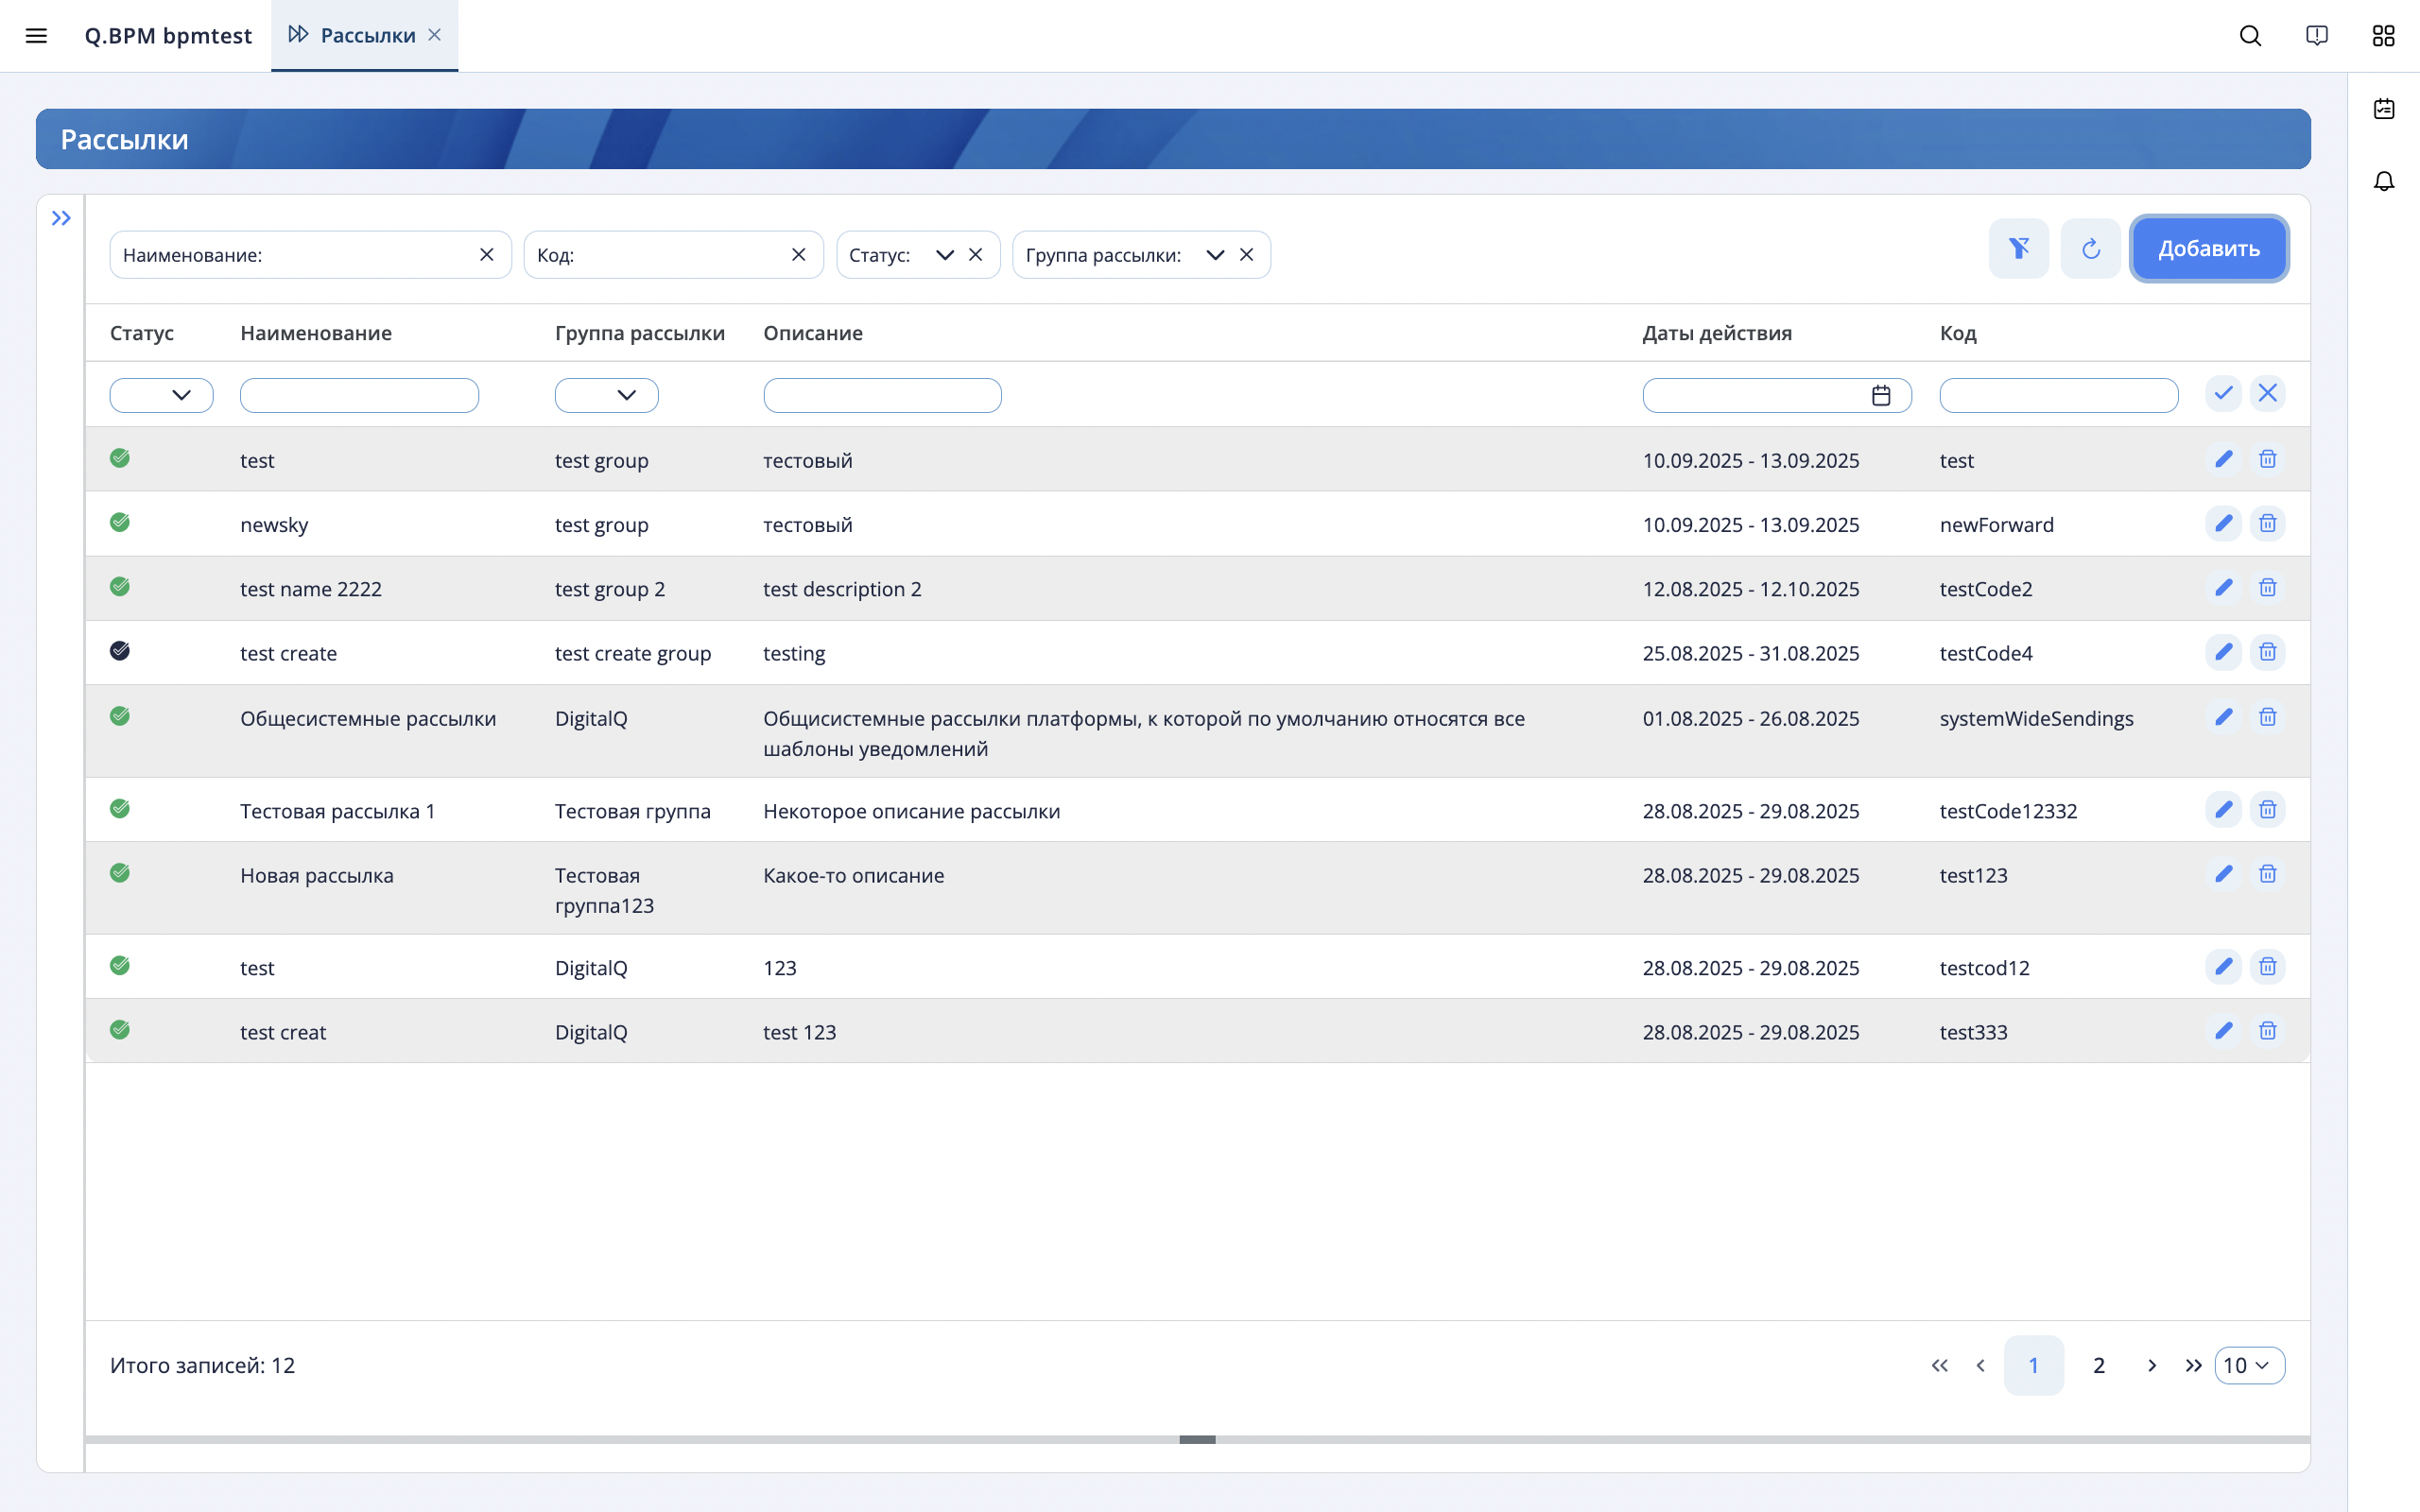
- Next, to add a new notification sending, click the "Add" button. An empty row will appear in the table in the inline editing mode. You need to specify the mailing list data in it: status, name, sinding group, expiration dates, and code. Then click the save button.
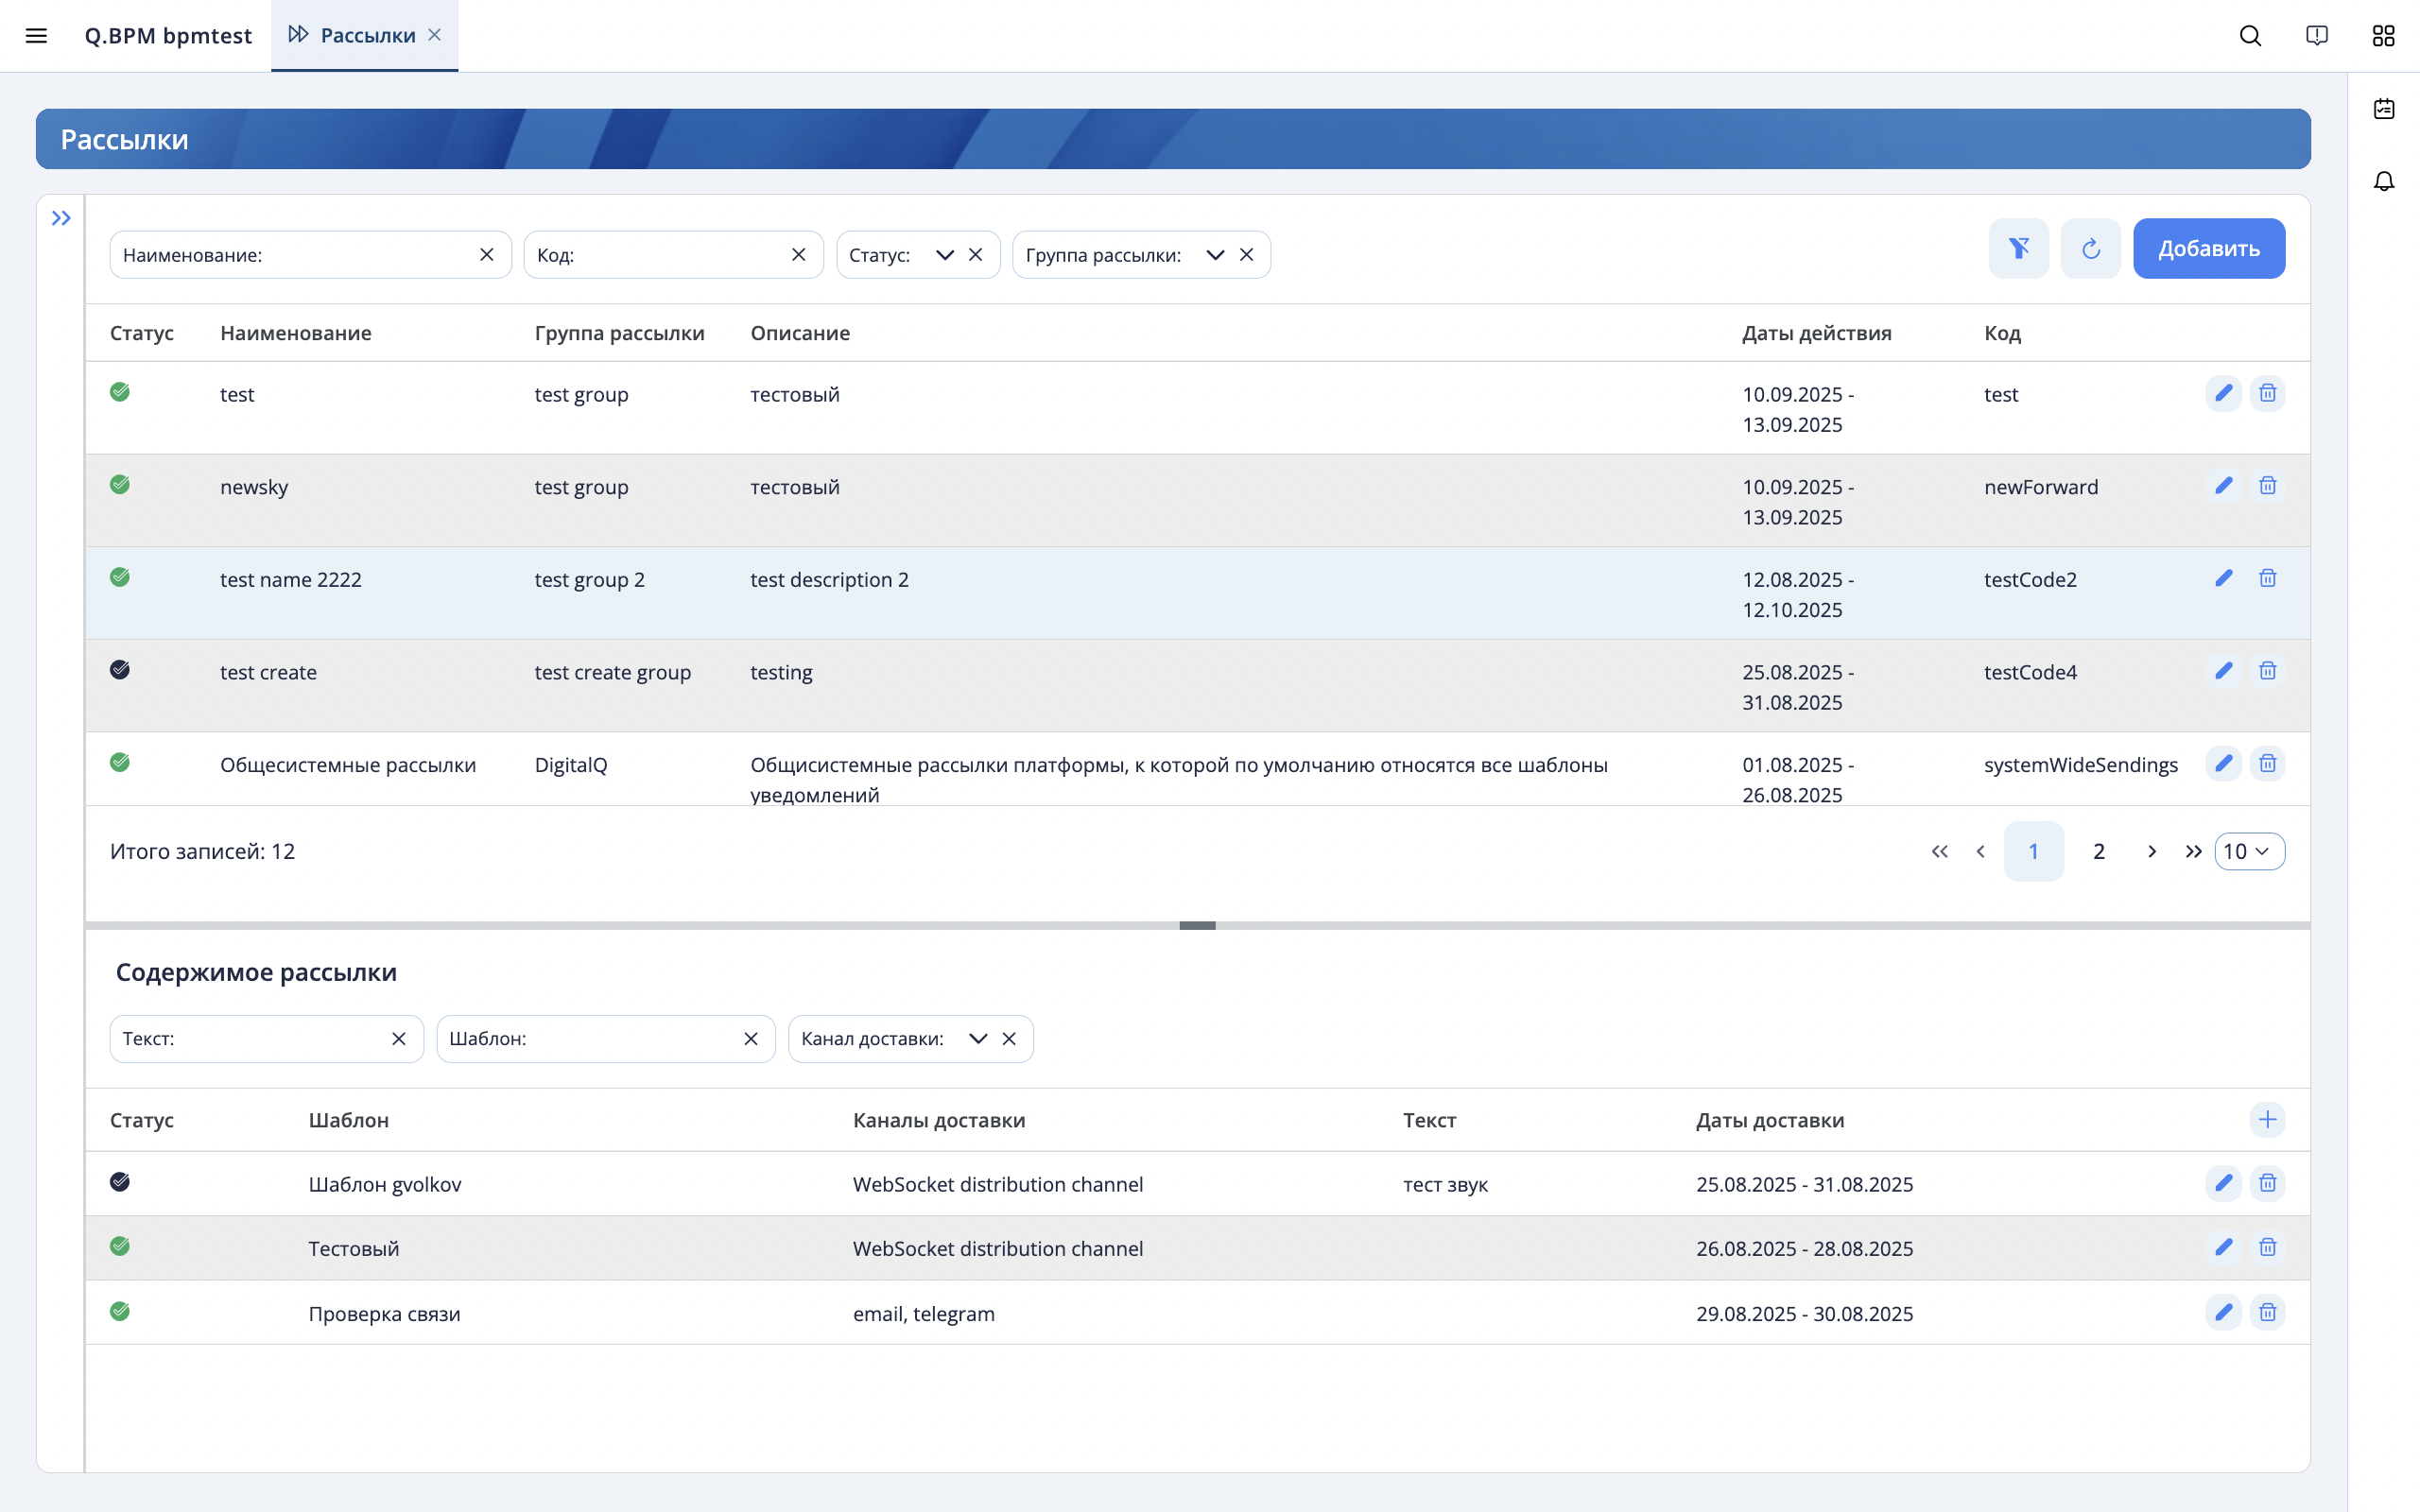
- Now you need to add notification templates to the notification sending, which will be included in it. To do this, click on the notification sending line to open a linked table at the bottom of the screen.
- In the linked table in, click the "+" button and in the inline editing line that appears, select a template from the drop-down list and set the action status. The rest of the data will be inserted from the template. Then click the save button on the line.

The notification sending has been created. You can now control the sending of notifications according to the templates specified in the notification sending.
Managing user notification sendings
The "Mailing management" section allows users to view and configure the list of notifications they are subscribed to. The sidebar on the right displays a hierarchy of notification groups along with the notifications included in each group. To configure a notification, locate it by name in the tree and click on it. The card on the right will display information about the notification and a list of channels through which its notifications are delivered.

The "Enabling mailing" toggle activates or deactivates the user's notification. Changes are saved at the moment of toggling. In the "Delivery Channels" tab, users can enable or disable the receipt of notifications via specific delivery channels. In the "Setting up a schedule" tab, users can configure a schedule for receiving notifications via specific delivery channels. Notifications will be delivered in the form of a table in an excel-file once within the configured period. If desired, the configured schedule can be disabled, and notifications will resume in the regular mode.

To set up a schedule, click the "+" button in the table header. In the sidebar that opens, specify the delivery channel and the desired period for receiving notifications:

Administration
In the "Administration" section, the ability to configure the storage time of notifications in the database has been added.
The user must have administrator rights to access the section.
To set the storage time for notifications in the database, go to the "Administration" section, click the "Edit" button and turn the "Setting the storage time for notifications" switch to the active state and specify the storage period of notifications in months. Then you need to save the changes by clicking the "Save" button. After saving the settings, notifications older than the specified date will be deleted from the database.
